For this tutorial, we’ve provided a simple app for you to deploy, made up of two containers:
moby-counter.
This app allows you to put Docker icons anywhere on your screen, and the locations are stored in a database.You will use Docker Compose to deploy the app on a Swarm cluster using Flocker as a volume driver.
You will then move both containers from one node to another by changing the Swarm constraints in the Docker Compose file and re-deploying. The app will keep its data!
A Flocker cluster with Swarm installed.
A Client machine with Docker Compose and access to the Swarm master.
If you used the CloudFormation installer:
The Client EC2 instance is preconfigured with Docker Compose. Use the following command to ssh in:
ssh -i <KeyPath> ubuntu@<ClientNodeIP>
<KeyPath> is the path on your machine to the .pem file you downloaded from AWS, for example: ~/Downloads/flocker-test.pem.
You will need <ClientNodeIP>, <ControlNodeIP>, <AgentNode1IP> and <AgentNode2IP> from the CloudFormation Outputs tab.
The rest of this tutorial will assume you are logged into the Client instance.
If you did not use the CloudFormation installer:
DOCKER_HOST¶Compose uses the environment variable DOCKER_HOST to know how to talk to the Swarm master.
If you used the CloudFormation installer, it is listed in the Outputs tab of your CloudFormation stack.
Use the following commands to set the DOCKER_TLS_VERIFY and DOCKER_HOST environment variables:
export DOCKER_TLS_VERIFY=1
export DOCKER_HOST=tcp://<ControlNodeIP>:2376
<ControlNodeIP> is the IP address of your Swarm master.
The two Docker Compose files below need to be saved on your Client machine, in a directory named swarm-compose-tutorial.
tutorial-downloads/flocker-swarm-tutorial-node1.yml
tutorial-downloads/flocker-swarm-tutorial-node2.yml
You can either click the cloud icons to save the files locally, and then move them onto your Client machine using using a transfer medium such as scp, or right click each file, and copy the link address and run the following commands with the tutorial URLs:
mkdir swarm-compose-tutorial
cd swarm-compose-tutorial
wget <Tutorial1Url>
wget <Tutorial2Url>
The Docker Compose files both have the same layout, as illustrated below, except the node2 file has constraint:flocker-node==2 instead of constraint:flocker-node==1.
version: "2"

volumes:
   postgres:
      driver: "flocker"
      driver_opts:
        size: "10GiB"
        profile: "bronze"

services:
   web:
     image: binocarlos/moby-counter
     ports:
        -  "80:80"
     environment:
        - "constraint:flocker-node==1"
        - "USE_POSTGRES_HOST=postgres"
        - "POSTGRES_USER=flocker"
        - "POSTGRES_PASSWORD=flockerdemo"
     network_mode: "bridge"
     links:
        - "postgres:postgres"
   postgres:
     image: postgres:9.5
     ports:
        -  "5432:5432"
     environment:
        - "constraint:flocker-node==1"
        - "POSTGRES_USER=flocker"
        - "POSTGRES_PASSWORD=flockerdemo"
        - "POSTGRES_DB=postgres"
        - "PGDATA=/var/lib/postgresql/data"
     network_mode: "bridge"
     volumes:
        - 'postgres:/var/lib/postgresql/data'
moby-counter app container is exposed on port 80.postgres container uses a volume_driver of flocker and uses a named Flocker volume called postgres.Now deploy the app by running:
docker-compose -f flocker-swarm-tutorial-node1.yml up -d
Note
At this point in the Volume Hub and you should be able to see the volume in use by the postgres container.
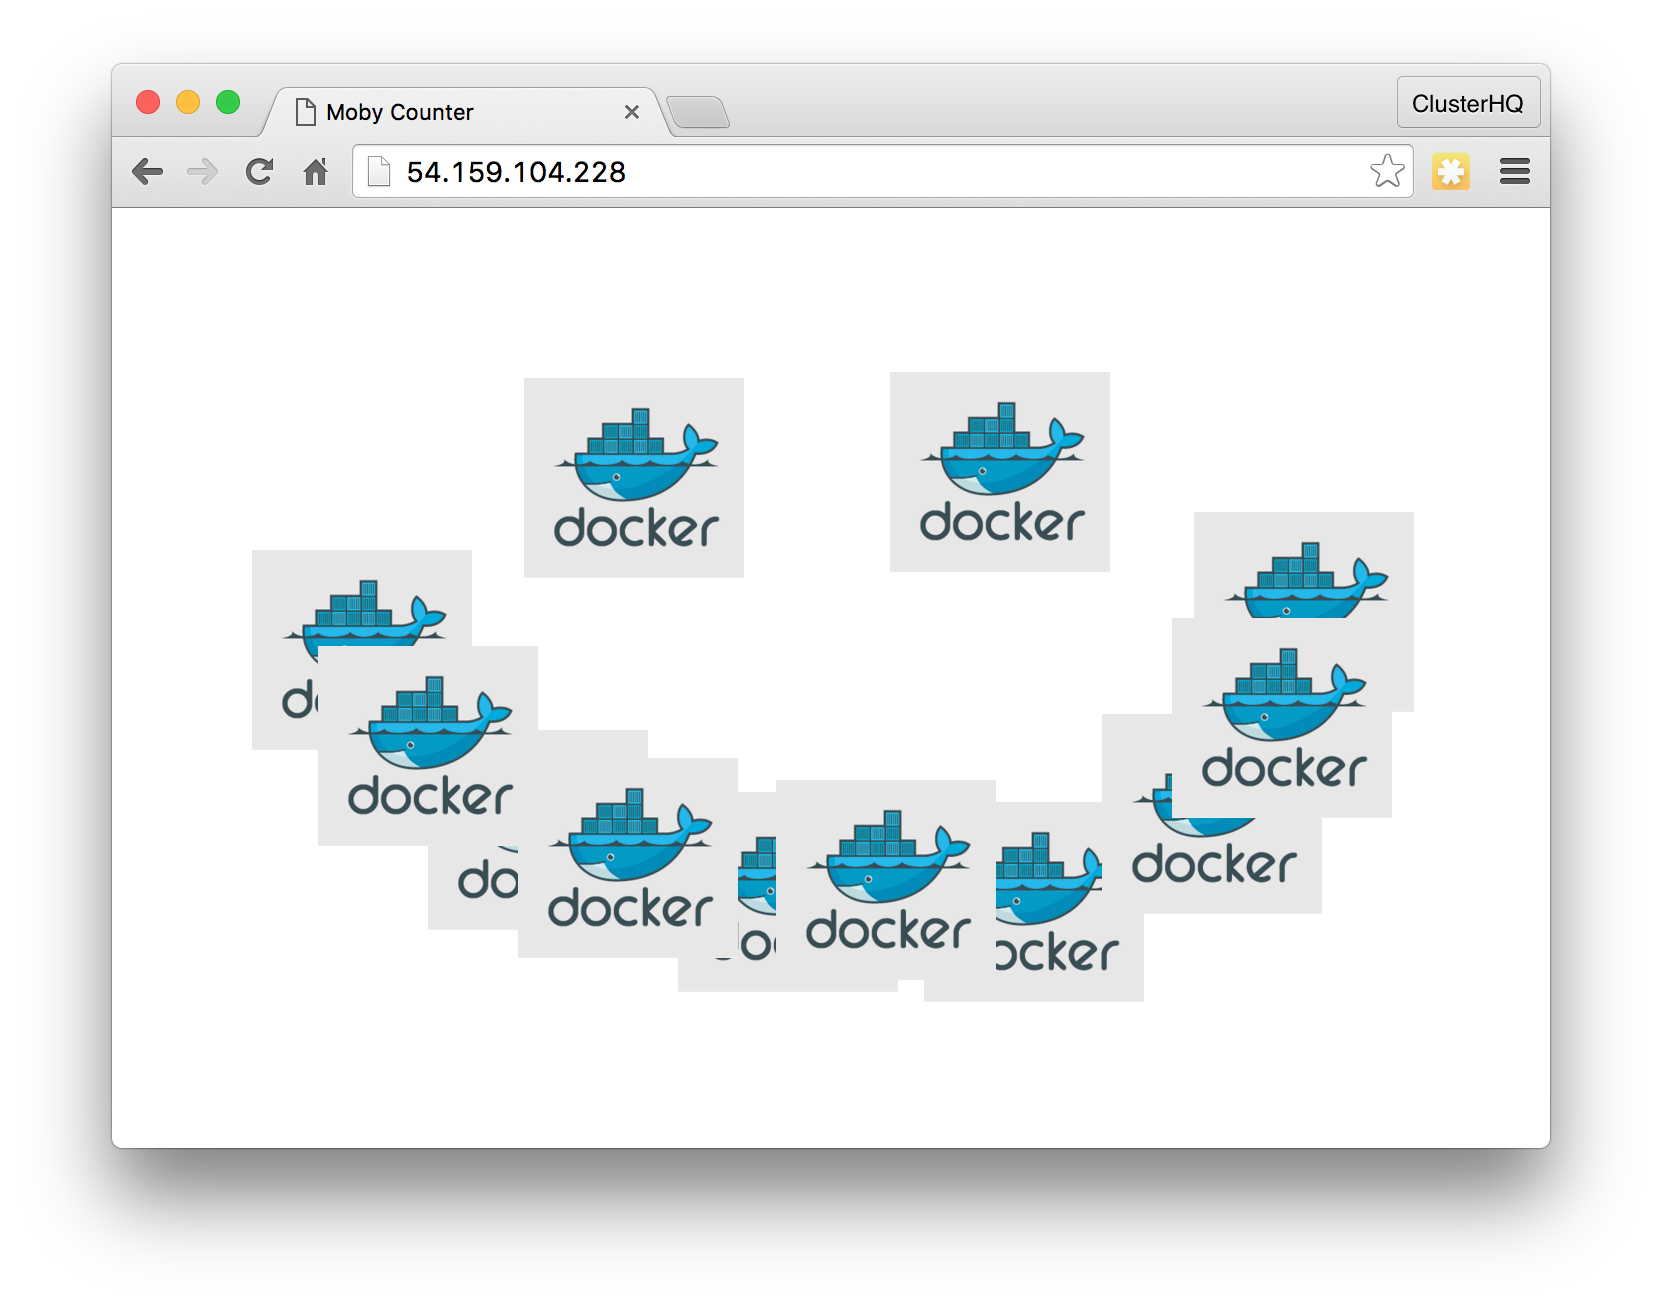
Open <AgentNode1IP> in a browser, and click around to add some Docker logos on the screen.
For example:

The locations of the logos get stored (persisted) in the PostgreSQL database, and saved to the Flocker volume.
Now we will demonstrate stopping the app on one machine and starting it on the other.
docker-compose -f flocker-swarm-tutorial-node1.yml down
docker-compose -f flocker-swarm-tutorial-node2.yml up -d
Note that we are destroying the first set of containers and then starting the second compose file which has the constraint to force Swarm to schedule the containers onto the second node.
Flocker will detach and attach the storage so that the container starts up with the expected data.
Note
At this point in the Volume Hub you should be able to see the volume being moved from node 1 to node 2 and the new container being started up.
Open <AgentNode2IP> in a browser, and you’ll be able to see that your data has persisted!
For example:
To clean up the containers and Docker’s references to the volumes, run:
docker-compose -f flocker-swarm-tutorial-node2.yml down
docker volume rm swarmcomposetutorial_postgres
To actually delete the volumes, we need to use flockerctl.
For more information, see About the Docker Integration and The flockerctl Command.
unset DOCKER_HOST
unset DOCKER_TLS_VERIFY
export FLOCKER_CERTS_PATH=/etc/flocker
export FLOCKER_USER=user1
export FLOCKER_CONTROL_SERVICE=<ControlNodeIP>
flockerctl ls
flockerctl destroy -d <DatasetID> # use <DatasetID> from output above
Note that this will destroy the postgres volume and all the data in it.
Now try deploying your own Docker Compose app!
volume_driver: flocker for any stateful containers you have."flocker_volume_name:/path_inside_container" syntax for one or more of the list elements under the volumes key.Note
Because we do not have a networking solution in this example, we use Swarm constraints to force both containers to be on the same node each time we deploy them so that regular Docker links work.